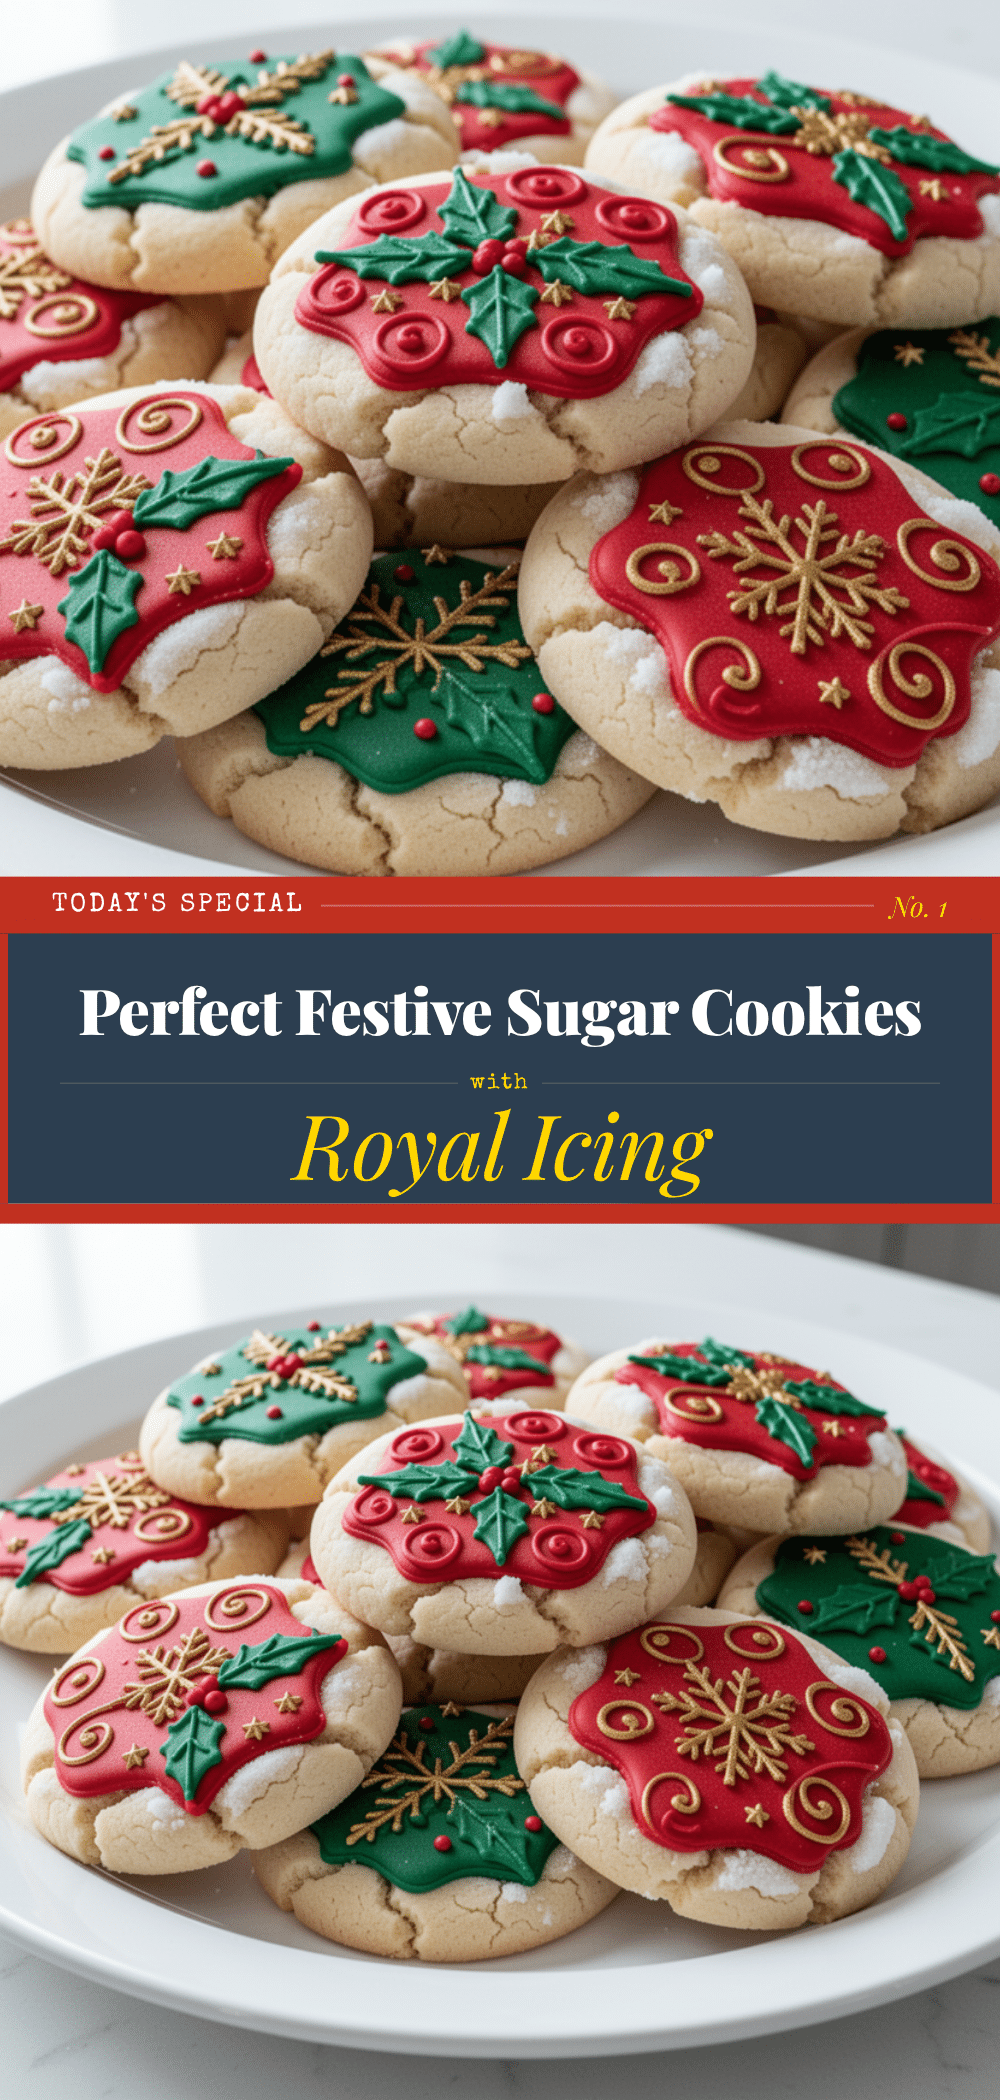
There is a specific kind of panic that sets in when you realize it’s December 15th and you haven’t made Christmas cookies yet. For years, I was that person. I’d stare at my pantry, feeling the weight of holiday expectations pressing down on me, wondering if I had the energy to deal with dough chilling, rolling, cutting, and decorating. I wanted cookies that looked like they came from a fancy bakery but tasted like something my grandma used to make. I wanted the ones that get eaten first, the ones that people ask for the recipe to, the ones that disappear before the plate hits the table.
I tried dozens of recipes. Some were too soft and crumbled into icing disasters. Others were so hard you could break a tooth on them—perfect for stacking, terrible for eating. Then, about five years ago, I finally cracked the code. It wasn’t a fancy ingredient or a complicated technique. It was just a little extra cornstarch and a specific way of handling the butter. The result? These Christmas sugar cookies with royal icing. They hold their shape beautifully in the oven, they have that perfect snap when you bite into them, and the royal icing sets hard enough to stack but soft enough to enjoy.
These cookies have become my holiday tradition. My sister-in-law, who claims she “doesn’t really like sweet things,” always asks for three. My kids love the decorating part almost as much as the eating part. And honestly? Once you make these, you’ll understand why everyone always asks for the recipe. It’s not just about the flavor (though it’s amazing). It’s about the nostalgia. It’s about the smell of vanilla and sugar filling your kitchen while the oven hums away. It’s about the quiet satisfaction of creating something beautiful and delicious with your own hands. If you’re looking for a recipe that delivers on every front—looks, taste, and ease—this is it. You’re going to love these Christmas sugar cookies.
Why You’ll Love This Recipe
Look, I get it. You have a million things to do right now. But trust me on this one. Making these cookies is the most rewarding part of the holiday prep process. Here’s why they’ve earned a permanent spot in my holiday rotation:
- They Actually Hold Their Shape — I’m serious. No spreading, no puffing up, no losing those intricate details. The dough is firm enough to roll thin but tender enough to bite. The royal icing captures every tiny detail you pipe on, from snowflakes to gingerbread men.
- Perfect Texture Every Time — Not too soft, not too hard. These cookies have a crisp exterior that gives way to a soft, cake-like interior. It’s the texture of a classic sugar cookie, elevated. You get that satisfying snap, but it doesn’t feel like you’re chewing on a rock.
- Make-Ahead Friendly — This is the real secret weapon. You can make the dough weeks in advance, freeze it, and bake them fresh when you’re ready. The icing can also be made ahead and stored. This means you’re not stressed on Christmas Eve trying to finish everything at once. You’re sipping wine, listening to music, and having fun decorating.
- Customizable for Any Skill Level — Are you a piping pro? Go for it. Are you a beginner with a squeeze bottle? That works too. You can do simple dots and lines, or intricate patterns. These cookies forgive mistakes beautifully because the icing dries clear and hard.
- Smells Incredible — The aroma of vanilla and baked sugar is pure holiday magic. It fills the house and makes everyone feel festive. It’s the kind of smell that makes people wander into the kitchen asking, “What’s baking?”
This recipe is my answer to “what should I bring to the cookie exchange?” every year. It’s reliable, it’s delicious, and it’s always a hit. Once you make these Christmas sugar cookies, you’ll wonder why you ever bought store-bought ones again.
Ingredients You’ll Need
Here’s the best part: you probably have most of these ingredients already. This isn’t a recipe that requires a special trip to the store for obscure items. It’s straightforward, pantry-friendly baking. I’m particular about a few things here, and I’ll tell you exactly why.
For the Cookies
Unsalted butter (1 cup / 226g, softened) — This is non-negotiable. Use real butter, not margarine. Soften it to room temperature. If it’s too soft and greasy, your cookies will spread. If it’s too hard, they’ll be dense. Think pliable, like clay.
Granulated sugar (1 cup / 200g) — This gives the cookies their crisp edges. Don’t use brown sugar here; it’ll make them too chewy and dark. We want that classic sugar cookie look.
Egg (1 large, room temperature) — Room temperature eggs incorporate better into the batter, leading to a more uniform texture. Cold eggs can cause the butter to seize up slightly.
Vanilla extract (2 teaspoons) — Use pure vanilla extract, not imitation. The flavor makes a huge difference. I use a good quality one because you’ll taste it.
All-purpose flour (3 cups / 375g) — Spoon and level your flour. Don’t scoop it directly from the bag, or you’ll pack it down and get dry cookies. I use Gold Medal or King Arthur, but any good AP flour works.
Cornstarch (2 tablespoons) — This is the secret ingredient. It tenderizes the dough and helps the cookies hold their shape. It’s what gives them that delicate, melt-in-your-mouth texture.
Baking powder (1 teaspoon) — Just enough to give them a tiny lift. Don’t add too much, or they’ll puff up and lose their details.
Salt (½ teaspoon) — Essential for balancing the sweetness. Don’t skip it.
For the Royal Icing

Confectioners’ sugar (4 cups / 480g, sifted) — Sifting is crucial. Royal icing can get lumpy if you don’t sift the sugar. I do this every time to ensure a smooth finish.
Egg whites (2 large, room temperature) — Or use 2 tablespoons of meringue powder mixed with 6 tablespoons of water. Egg whites give a glossy finish, but meringue powder is safer if you’re concerned about raw eggs. I’ve used both and prefer the taste of fresh egg whites, but meringue powder works great too.
Lemon juice (1 teaspoon) — Freshly squeezed. It adds a subtle brightness that cuts through the sweetness and helps stabilize the icing.
Food coloring (gel paste preferred) — Gel colors are more concentrated than liquid colors, so they won’t thin out your icing. I use red, green, and white for Christmas, but any color works.
Optional Decorations
Sprinkles — Jimmies or nonpareils. They stick to the wet icing beautifully.
Luster dust — For a touch of shimmer. Mix with a little vodka or lemon extract to paint details.
Equipment Needed
You don’t need fancy equipment for this. Here’s what I actually use:
Stand mixer or hand mixer — Mixing the dough by hand is possible but tiring. A mixer makes it quick and easy.
Rolling pin — A standard wooden rolling pin works fine. Make sure it’s clean and dry.
Cookie cutters — Any shapes you like. I have a set of Christmas-themed ones, but star and heart shapes are classics.
Piping bags or ziplock bags — For the icing. I use disposable piping bags with small tips for detail work, but a ziplock with a corner cut off works too.
Baking sheets — Heavy-gauge metal sheets are best. They conduct heat evenly. Avoid dark non-stick sheets if you can, as they can brown the bottoms too quickly.
Cooling racks — Essential for cooling the cookies completely before icing. If you ice warm cookies, the icing will melt and slide off.
How to Make It: Step-by-Step
Alright, let’s make these Christmas sugar cookies! I’m walking you through exactly how I do it, including the little tricks I’ve picked up over the years.
Step 1: Cream the Butter and Sugar (3 minutes)
In a large mixing bowl, beat the softened butter and granulated sugar together on medium-high speed until light and fluffy. This takes about 3-4 minutes. You want the mixture to look pale and airy. This step incorporates air into the dough, which helps the cookies rise slightly and become tender.
Step 2: Add Wet Ingredients (1 minute)
Beat in the egg and vanilla extract until fully combined. Scrape down the sides of the bowl with a spatula to ensure everything is mixed evenly.
Step 3: Mix Dry Ingredients (2 minutes)
In a separate bowl, whisk together the flour, cornstarch, baking powder, and salt. Gradually add the dry ingredients to the wet mixture, mixing on low speed until just combined. Do not overmix. Overmixing develops gluten, which makes the cookies tough. Stop as soon as you see no streaks of flour.
Step 4: Chill the Dough (1 hour)
Divide the dough in half and form each half into a disk. Wrap tightly in plastic wrap. Chill in the refrigerator for at least 1 hour, or up to 3 days. Chilling is crucial. It firms up the butter, which prevents the cookies from spreading in the oven. If you skip this step, your intricate cutouts will turn into blobs.
Step 5: Preheat and Prep (5 minutes)
Preheat your oven to 350°F (175°C). Line your baking sheets with parchment paper or silicone mats. This prevents sticking and makes cleanup easier.
Step 6: Roll and Cut (10 minutes)
On a lightly floured surface, roll out one disk of dough to about ¼-inch thickness. Use your cookie cutters to cut out shapes. Place them on the prepared baking sheets, about 1 inch apart. Re-roll the scraps and cut out more shapes. Try to be efficient to keep the dough from warming up too much.
Step 7: Bake (10-12 minutes)
Bake for 10-12 minutes, or until the edges are just barely golden. They should still look soft in the center. They will firm up as they cool. Overbaking will make them hard and crunchy instead of tender. Let them cool on the baking sheet for 5 minutes, then transfer to a wire rack to cool completely.
Step 8: Make the Royal Icing (10 minutes)
In a clean, grease-free bowl, beat the egg whites (or meringue powder mixture) with lemon juice until frothy. Gradually add the sifted confectioners’ sugar, beating on low speed until combined, then on high speed until stiff peaks form. The icing should be thick but pipeable. If it’s too thick, add a few drops of water. If it’s too thin, add more sugar.
Step 9: Color and Pipe (20 minutes)
Divide the icing into small bowls. Add gel food coloring to each, mixing until you reach your desired shade. Transfer the icing to piping bags fitted with small tips. Pipe designs onto the completely cooled cookies. Add sprinkles immediately if using, as they need the icing to be wet to stick.
Step 10: Dry (2-4 hours)
Let the cookies dry at room temperature until the icing is hard to the touch. This can take 2-4 hours depending on humidity. Do not rush this step, or the icing will smudge.
Expert Tips & Tricks
Here’s everything I’ve learned from making these dozens of times. These tips will save you from my mistakes.
Butter Temperature is Key
If your butter is too soft, your cookies will spread. If it’s too hard, they’ll be dense. Aim for room temperature butter that leaves a slight indent when you press it. If you’re in a hurry, you can soften butter in the microwave in 5-second bursts, but be careful not to melt it.
Don’t Overmix the Dough
Once you add the flour, mix just until combined. Overmixing makes the cookies tough. You want them tender and cake-like, not chewy like bread.
Chill, Chill, Chill
I can’t stress this enough. Chilling the dough is what makes these cookies hold their shape. If your dough gets warm while you’re cutting, pop it back in the fridge for 10 minutes. It’s worth it.
Use Gel Food Coloring
Liquid food coloring adds too much water to the icing, making it runny. Gel colors are concentrated and won’t affect the consistency. You can find them at most craft stores or baking supply shops.
Stiff Peaks for Royal Icing
Your icing needs to be stiff enough to hold its shape but fluid enough to pipe. Test it by lifting the beaters. The icing should form a peak that holds its shape without drooping. If it droops, beat it longer. If it’s too stiff, add a drop of water.
Work in Sections
Don’t try to ice all the cookies at once. Ice a few, let them set, then move on. This prevents the icing from drying out on the cookie before you can pipe details.
Variations & Substitutions
Once you’ve nailed the basic version, here’s how you can mix it up. I’ve tried all of these.
Flavor Variations
Lemon Sugar Cookies — Add 1 tablespoon of lemon zest to the dough. Swap the vanilla extract for lemon extract. The icing can be flavored with a bit more lemon juice.
Peppermint Cookies — Add 1 teaspoon of peppermint extract to the dough. Use red and white icing. Crushed candy canes make great sprinkles.
Vanilla Bean Cookies — Use a scraped vanilla bean instead of extract. The specks look beautiful and add amazing flavor.
Dietary Modifications
Gluten-Free — Use a 1:1 gluten-free flour blend. The cornstarch helps with texture, so these work well with GF flour. Note that some GF flours absorb more liquid, so you may need a splash more milk or water.
Dairy-Free — Use a dairy-free butter substitute. The icing is naturally dairy-free if you use egg whites or meringue powder.
Egg-Free Icing — Use meringue powder instead of fresh egg whites. It’s safer for those concerned about raw eggs and works just as well.
Decorating Ideas
Two-Tone Icing — Pipe a base layer of one color, let it dry, then pipe a second layer on top for a 3D effect.
Stained Glass Effect — Cut out the centers of some cookies, pipe a border, and fill with crushed hard candies. Bake as usual. The candies melt into a stained glass look.
Hand-Painted Details — Once the icing is dry, mix luster dust with a little vodka or lemon extract to create a paint. Use a small brush to add shimmer to snowflakes or stars.
Serving & Storage
These cookies are best stored in an airtight container at room temperature. Layer them between parchment paper to prevent the icing from sticking. They’ll keep for up to 2 weeks.
If you’re mailing these or giving them as gifts, make sure the icing is completely dry. You can also freeze the baked cookies (before icing) for up to 3 months. Thaw them before decorating.
Pair these with a cup of hot cocoa or mulled wine for the ultimate holiday treat. They’re perfect for cookie exchanges, holiday parties, or just enjoying with your family.
Nutrition Information
I’m not a nutritionist, but here’s the breakdown if you’re tracking. Note that this varies based on icing thickness and specific brands used.
Per Cookie (approx. 2-inch cookie with icing):
– Calories: 120
– Fat: 4g
– Carbs: 20g
– Sugar: 12g
– Protein: 1g
These are indulgent treats, so enjoy them in moderation. The royal icing adds sugar, so be mindful if you’re watching your intake. But let’s be honest—you’re making these for the holidays. Enjoy them!
Final Thoughts
So that’s my go-to Christmas sugar cookies with royal icing! I’ve probably talked your ear off at this point, but when you make a recipe this often, you have a lot to say about it. These cookies have saved my holiday sanity more times than I can count. They’re my answer to “what should I bake?” when I’m tired, don’t want takeout, and still want something that tastes really good. My kids are happy, my guests are impressed, and I’m happy because I’m not stressed about cooking.
Make it yours! Try different shapes, colors, and flavors. The best recipes are the ones you adapt to your family’s tastes. If you make these, drop a comment and let me know what you think! I love hearing how recipes turn out in your kitchen. And if something doesn’t work, tell me that too—I’m here to help troubleshoot.
Happy baking! And I hope your kitchen smells half as good as mine does right now.
Frequently Asked Questions
Can I use liquid food coloring instead of gel?
You can, but gel colors are much more concentrated. Liquid colors add too much water to the icing, which can make it runny and prevent it from drying hard. If you must use liquid, use it sparingly and add more sugar if needed. Gel colors are worth the investment for this recipe.
Why did my cookies spread in the oven?
This usually happens if the butter was too soft or if the dough wasn’t chilled long enough. Make sure your butter is at room temperature, not melted. Chill the dough for at least 1 hour, or even overnight if you’re short on time. Also, make sure your oven is properly preheated.
Can I freeze the decorated cookies?
It’s not recommended. The icing can become sticky or discolored when frozen and thawed. It’s better to freeze the baked, undecorated cookies. Thaw them completely, then decorate them fresh. This ensures the best texture and appearance.
My icing is too thin—what do I do?
Add more sifted confectioners’ sugar, one tablespoon at a time, beating well after each addition. If it’s too thick, add a few drops of water or milk. You want a consistency that flows off the spoon in a ribbon but holds its shape.
Can I make the dough ahead and freeze it?
Yes! Wrap the dough disks tightly in plastic wrap and then in foil. Freeze for up to 3 months. Thaw them in the refrigerator overnight before rolling and baking. This is great for meal prep.
Why is my royal icing cracking?
Cracking can happen if the icing is too thick or if the cookies are not completely cool before icing. Make sure your cookies are at room temperature. Also, ensure your icing is smooth and free of air bubbles by beating it longer.
Can I use a stand mixer for the icing?
Yes, a stand mixer with a whisk attachment works great. Beat on medium-high speed until stiff peaks form. This can take 5-7 minutes. Watch it closely to avoid overbeating, which can make the icing grainy.
Pin This Recipe!

Christmas Sugar Cookies with Royal Icing
- Total Time: 1 hour 45 minutes (including chilling and drying)
- Yield: Approx. 24-30 cookies
Description
These homemade Christmas sugar cookies hold their shape beautifully, offering a perfect snap with a tender interior. Paired with a hard-setting royal icing, they are ideal for intricate decorating and make-ahead holiday baking.
Ingredients
- 1 cup (226g) unsalted butter, softened to room temperature
- 1 cup (200g) granulated sugar
- 1 large egg, room temperature
- 2 teaspoons pure vanilla extract
- 3 cups (375g) all-purpose flour, spooned and leveled
- 2 tablespoons cornstarch
- 1 teaspoon baking powder
- ½ teaspoon salt
- 4 cups (480g) confectioners’ sugar, sifted
- 2 large egg whites, room temperature (or 2 tbsp meringue powder + 6 tbsp water)
- 1 teaspoon fresh lemon juice
- Gel food coloring (red, green, white, etc.)
- Sprinkles (optional)
- Luster dust (optional)
Instructions
- In a large mixing bowl, beat the softened butter and granulated sugar on medium-high speed for 3-4 minutes until light and fluffy.
- Beat in the egg and vanilla extract until fully combined, scraping down the sides of the bowl.
- In a separate bowl, whisk together the flour, cornstarch, baking powder, and salt.
- Gradually add the dry ingredients to the wet mixture on low speed until just combined. Do not overmix.
- Divide the dough in half, form into disks, wrap in plastic wrap, and chill in the refrigerator for at least 1 hour (or up to 3 days).
- Preheat oven to 350°F (175°C) and line baking sheets with parchment paper.
- On a lightly floured surface, roll out dough to ¼-inch thickness. Cut into shapes and place on baking sheets 1 inch apart.
- Bake for 10-12 minutes until edges are barely golden. Cool on the sheet for 5 minutes, then transfer to a wire rack to cool completely.
- In a clean, grease-free bowl, beat egg whites (or meringue mixture) and lemon juice until frothy.
- Gradually add sifted confectioners’ sugar, beating on low then high speed until stiff peaks form.
- Divide icing into bowls, add gel food coloring, and transfer to piping bags.
- Pipe designs onto completely cooled cookies and add sprinkles immediately if using.
- Let cookies dry at room temperature for 2-4 hours until the icing is hard to the touch.
Notes
Ensure butter is at room temperature (pliable like clay) to prevent spreading. Chill dough thoroughly to maintain shape. Use gel food coloring to avoid thinning the icing. Cookies can be frozen before icing for up to 3 months. Store finished cookies in an airtight container with parchment between layers for up to 2 weeks.
- Prep Time: 30 minutes
- Cook Time: 10-12 minutes per batch
- Category: Dessert
- Cuisine: American
Nutrition
- Serving Size: 1 cookie (approx. 2-
- Calories: 120
- Sugar: 12
- Sodium: 100
- Fat: 4
- Saturated Fat: 2.5
- Carbohydrates: 20
- Fiber: 0.5
- Protein: 1
Keywords: Christmas cookies, sugar cookies, royal icing, holiday baking, make-ahead cookies, cookie exchange, homemade cookies